Thanks for selecting RapidPage for your email services. There are two ways to access your email.
- Using Webmail or
- Using your favorite email client on your smart device (Android or iOS) or computer (Outlook, Thunderbird, Apple Mail, etc)
IMPORTANT NOTE #
It is safe to delete your old email account from your phone and Outlook desktop because emails have been transferred from the old system to the new IceWarp system. We recommend doing this FIRST before adding the accounts using the instructions below.
IMAP Settings #
The IMAP settings for IceWarp Email are as follows:
| Type | Name | Port | Security |
| IMAP Server | Contact RapidPage for this info | 993 | SSL/TLS |
| SMTP Server | Contact RapidPage for this info | 465 | SSL/TLS |
The “NAME” for your IMAP and SMTP server will also be sent to you in your welcome message for the email system but the above name will also work. The title of the welcome message is:
[RapidPage] Your New Email Information 📨
WEBMAIL #
To access your mail from a browser (Chrome, Edge, Safari, etc.) go to:
When you get this screen, just enter your full email address you were provided by RapidPage staff.
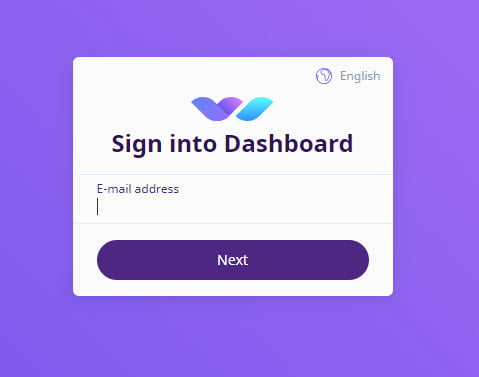
Click next

Enter your password and click Sign In.
The first time you login you will be prompted to setup your account.

Fill in your details and then click NEXT

Click “Skip this step >”

Click “Skip this step >”
You will then receive a message that your account is ready to use.

Click “Got It” to continue.

This is your welcome screen. We recommend going through the tutorial otherwise you can click the link “Skip Wizard” to access your email.
If you need further help on using the IceWarp Webclient software go to this link:
Access your mail using Outlook #
CAUTION
Do NOT use the normal Outlook process to ‘Add Account’ because you will need to specify additional information to set up Outlook correctly.
Setting up Email Manually in Outlook
- Click the Windows Start key and type Control Panel
- Click on Control Panel to open it up then click the icon “Mail (Microsoft Outlook)”

3) Then select “Email Accounts”

3) Click Email Accounts
4) Click New (to add a new email account)
5) Click Manual Setup
6) Click Next

7) Select “POP or IMAP”
8) Click Next

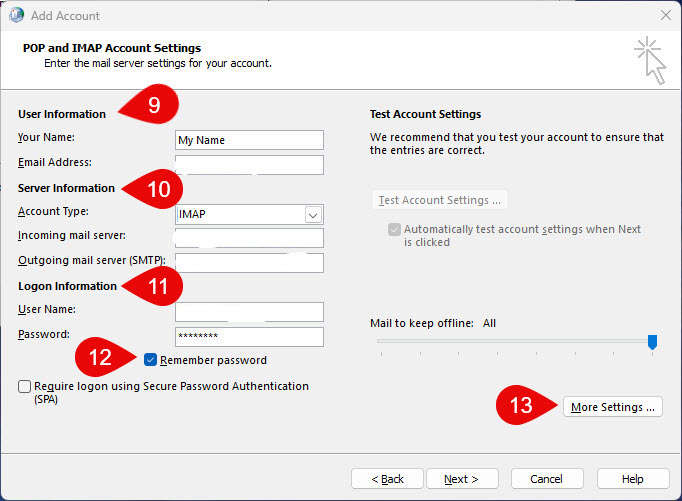
9) Fill in your name and your new email address
10) Make sure the server information is what was sent to you in your Welcome email. If your domain name is “domainname.com” then the incoming and outgoing server would be mail.domainname.com
11) For login information, enter your new email address again and the password you were provided,
12) Make sure to tick the box “Remember password”
13) Click the box “More Settings”
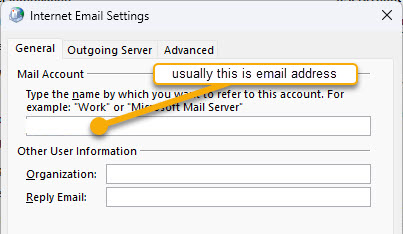
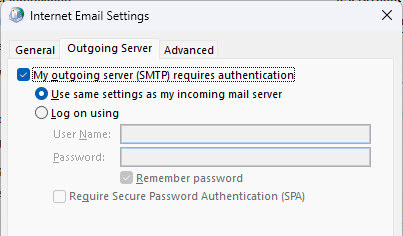
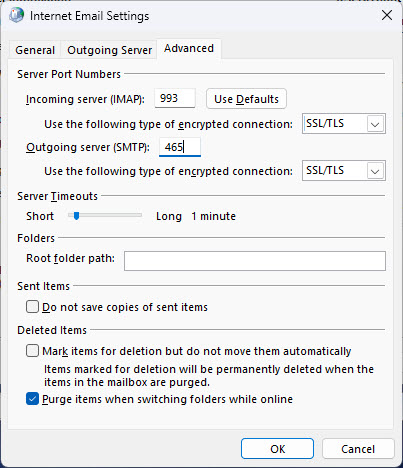
This is the dialog box that will appear during the testing process.

Once testing has completed successfully, then click CLOSE. If the testing fails, go back to make sure the email and password are correct and also the other advanced settings.
Android Mobile Access to IceWarp #
You can access your email from your Android mobile phone using Outlook on your phone. Similar steps as setting up Outlook desktop.
iOS Mobile Access to IceWarp #
You can access your email from your iPhone using the iPhone email. Go to settings and then accounts. Add your email to the iPhone as an IMAP account and use the same IMAP/SMTP settings as the Outlook Desktop.
Setting Up Microsoft Outlook on Mobile
Go to the App store and download the Microsoft Outlook App to your phone
Instructions for setting up Outlook: click here.


